In this lab you are going to build a simplified version of the game Memory. For the game, you will have a collection of tiles with letters printed on them face down in front of you. At each step of the game, you turn over two tiles. If they match, you remove them. If they don’t then they need to be flipped back over before you try again. The game is over when there are no more tiles left.
Part 0: Getting started
To begin, download the file lab09.zip by clicking the blue “Download Starter Files” button at the top of the lab, and extract the files from the zip file into a directory called lab09 inside your labs directory. The starter code contains lab09.py, which currently includes our standard pygame boilerplate.
Part 1: Preparing the Tile Class
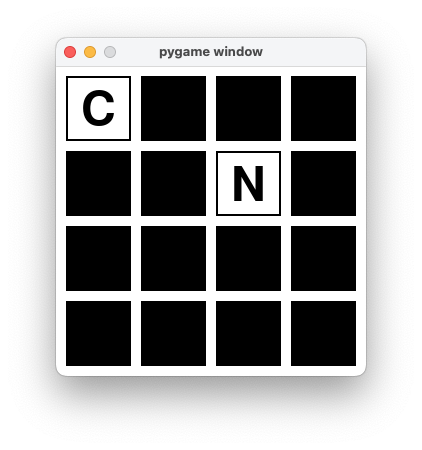
To start, you’ll create your Tile class, which will represent tiles of letters that you can flip on the board. As we go on, we will make Tile more complex, but to start, you’ll write the basics. Your goal is to make something that looks like the tile below:
New Classes and Methods
Tile
Properties
value
str
x
int
y
int
face_down
bool
Tile.flip
Return type
None
Tile.display
Parameters
surface
pygame.Surface
Return type
None
Steps
Step 1: Create a class called Tile and give it an __init__ method. __init__ should take three arguments besides self: value, x, and y. Don’t forget your docstring!
Step 2: In __init__, create a property self.value and set it to value. Then, create a property self.rect, which should be a pygame.Rect object. The pygame.Rect constructor takes in an \(x\) value, a \(y\) value, a width and a height. Both the width and height should be defined as SIZE, which is a global constant. Finally, define a property self.face_down, which should start as True.
Step 3: Test that your __init__ is implemented correctly. If you initialize a tile, you should see the following:
Step 6: Add a method to Tile called display that takes in one argument besides self: surface. Don’t forget your docstring!
Step 7:display should show a face-down tile on the screen if your tile is face-down. If self.face_down is True, draw a black tile on your screen using pygame.draw.rect(surface, (0, 0, 0), self.rect)
Step 8: Test that your tile displays correctly on the screen. In main, create a tile before your game loop (tile = Tile("A", 0, 0)). Then, after the screen is filled with white, display the tile by calling the display method with your screen as input. When you call main, you should see a mostly white screen with a black corner (the tile).
Step 9: Now, you’ll implement the flipped over version of the tile. To start, we’ll just make it a white tile with a black border in an else branch. Draw a white tile in the same way you drew a black tile above, with the RGB value (255, 255, 255) representing the color. Then, add a black border with a width of two pixels by adding pygame.draw.rect(surface, (0, 0, 0), self.rect, 2).
Step 10: To confirm that this worked, call tile.flip() after initializing your tile and call main again. You should see a white tile with a black outline in the upper-left corner.
Step 11: Finally, copy in the code below to display your value on the tile. Call main and confirm that your tile now has the letter "A" on it.
Now that you have the ability to make tiles, let’s work on creating a board with multiple tiles. Your goal will be to render a grid of tiles, with the number of rows equal to the global constant ROWS and the number of columns equal to the global constant COLUMNS.
New Classes and Methods
Board
Properties
grid
List[List[Tile]]
Board.display
Parameters
surface
pygame.Surface
Return type
None
Steps
Step 1: Create a class called Board and give it an __init__ method. __init__ should only take self as a parameter. Don’t forget your docstring!
Step 2: Create an property self.grid, which will be a list of lists of tiles representing the board. Then, copy in the following code, which initializes the grid to have "A" tiles in all of the correct positions. You’ll note that we compute our x and y values for the Tile position using the SIZE and PADDING to ensure that we have some padding between tiles on the board.
for x inrange(COLS): column = []for y inrange(ROWS): tile = Tile("A", x * (PADDING + SIZE) + PADDING, y * (PADDING + SIZE) + PADDING) column.append(tile)self.grid.append(column)
Step 3: Test that your __init__ is implemented correctly. You’ll do some quick checks of what your Board’s grid looks like:
Step 4: Add a method to Board called display that takes in one argument besides self: surface. Don’t forget your docstring!
Step 5: Copy this code into display; it calls the display method on each of the tiles in your grid.
for x inrange(COLS):for y inrange(ROWS):self.grid[x][y].display(surface)
Step 6: Test that your tile displays correctly on the screen. In main, replace the Tile you were initializing with a Board called board. Then, after the screen is filled with white, display board rather than tile. When you call main, you should see a grid of black tiles.
Step 7: Your tile’s values should be pairs of random letters, rather than all being "A". To make that happen, follow these steps:
Add the following line to the Board’s __init__ method before the loop, which will choose ROWS * COLS // 2 letters1 from the alphabet2 at random, then duplicate each letter.
When you initialize each tile, change out the value to be tile_options[x * ROWS + y]. This will be a new index for each tile.3
Step 8: To test that your initialization has worked, call tile.flip() before adding it to Column in your code. Now, when you call main, you should see your tiles. Make sure that there is a pair for each value. Once your grid looks good, remove the line that was used to flip your tile.
Part 3: Handling Clicks
Now we’ve got a nice board to work with, but it doesn’t do anything. We’d like to make sure that when a tile is clicked, it flips! We’ll do that by using our event loop and writing a handle_click method in our Board class.
New Methods
Board.handle_click
Parameters
mx
int
my
int
Return type
None
Steps
Step 1: Add the following elif to your event loop. It gets the position of a mouse click, then calls the handle_click method on our board.
elif event.type== pygame.MOUSEBUTTONDOWN: mx, my = pygame.mouse.get_pos() board.handle_click(mx, my)
Step 2: If you’re saying “what, what handle_click method” you’re right - we haven’t defined it yet! Add a handle_click method to Board that takes two arguments other than self, mx and my (the mouse’s x/y position). Don’t forget your docstring!
Step 3: Add the following code to your handle_click, which will flip tiles when they are clicked.
for x inrange(COLS):for y inrange(ROWS): tile =self.grid[x][y]if tile.rect.collidepoint(mx, my): tile.flip()
Step 4: Call main to render your board and confirm that clicking on your tiles flips them. Try flipping the same tile multiple times and confirm that it behaves as expected.
Part 4: Matching Tiles
Finally, we’ll implement the actual logic of our game! At a high level:
A tile should be flipped when the user clicks it
If the user clicks on a second tile, it should also be displayed. Even if the two tiles are a match, we’d like to keep showing them on the screen so that the user can see the match!
If the user clicks on a third tile, we should:
Handle the first two tiles. That can be either by flipping them back (if they are not a match) or removing them from the board (if they are a match). We’ll remove tiles by hiding them.
Show the new tile.
Updated Class Properties
Board
Properties
grid
List[List[Tile]]
flipped_tiles
List[Tile]
Tile
Properties
value
str
x
int
y
int
face_down
bool
hidden
bool
Steps
Step 1: Create a new property in Board called self.flipped_tiles and make it an empty list.
Step 2: In the loop in handle_click in which tiles are flipped, when a tile is flipped, add the tile to self.flipped_tiles after flipping it.
Step 3: Now, we’ll execute the logic to flip tiles back over if they are matches:
We’re really only concerned with whether or not tiles match if a third tile is flipped, so add a condition that checks if more than two tiles have been flipped.
Add a nested condition that checks that the values of the tiles don’t match.
In that condition, flip over the first two tiles in self.flipped_tiles.
Then, outside of the condition, remove the first two tiles from self.flipped_tiles
Step 4: Try out your game by calling main. At this point, you should find that you have a pretty decent matching game! However, the tiles won’t disappear after they’re match, they’ll just stay on the screen.
Step 5: To remove the tiles from the screen once they are matched,
Add a new property self.hidden to Tile, which should initially be False.
Change your display method in Board to only display a tile if it is not hidden.
Add an else case to the final condition in your handle_click method. It should look a lot like your if case, except for instead of calling the flip method on each tile, you should set the hidden property of the tile to True.
Step 6: Test out your game by calling main. It should be basically the same as before, but the tiles should disappear when they are matched.
Part 5: Finishing Up
You’ll notice that your game mostly works, but there are a few things to clean up:
When the user clicks on a tile multiple times, it flips back - which isn’t necessarily the worst behavior, except for it keeps being added to self.flipped_tiles which could cause problems.
At the end of the game, the last two tiles are still on the screen unless you click on the background area.
We’ll fix these issues to complete the game!
Updated Class Properties
Board
Properties
grid
List[List[Tile]]
flipped_tiles
List[Tile]
tiles_left
List[Tile]
Steps
Step 1: Fix the multiple clicks problem:
Play your game and confirm that something weird happens when you click on the same tile multiple times during gameplay.
Add an and to your condition in handle_click that checks if a tile overlaps with the mouse click (tile.rect.collidepoint(mx, my)). In the new version of the condition, you should also check that the tile is face down.
Play your game and confirm that the weird behavior from step 1 is gone.
Step 2: Fix the end of game problem:
Add a property self.tiles_left to Board, and initialize it in __init__ to the total number of tiles on your board.
When you hide tiles, decrease self.tiles_left by 2.
Change the condition that checks if more than two tiles have flipped. Set it to be true when more than two tiles have flipped OR the number of flipped tiles is the same as the number of tiles you have left (i.e., you have flipped both remaining tiles).
Step 3: Play your game a few times and make sure there are no lingering bugs.
Turning in your work
One you are done, submit lab09.py to gradescope and ensure that you have passed all of the tests. Your file should contain the classes Tile and Board. Each method should have a docstring.
In the interest of time, we left you with a fairly simplified game. If you want to keep playing with this lab, there are a number of things you could do.
This is currently a meditative game – you just play until you have all of the tiles. You could make it more competitive by scoring it based on the number of flips it took to clear the board.
You could make the tiles look nicer. both the fronts and the back are pretty primitive.
If you want a real challenge, you could figure out how to add a timer so the unmatched tiles flip themselves back over if the player hasn’t made a chose yet.
You could had a reset command (like typing ‘r’) that would re-initialize everything so you could play again