Working with Images
We will use a module called middimage that gives you a simple interface for working with images. It was written by Middlebury Professor Christopher Andrews and is built on Pillow, the standard Python library for images.
Installing midd-media
middimage is part of the midd-media package. You only need to install it once.
In Thonny, choose Tools → Manage packages…
Type
midd-mediain the search box and click Search on PyPI.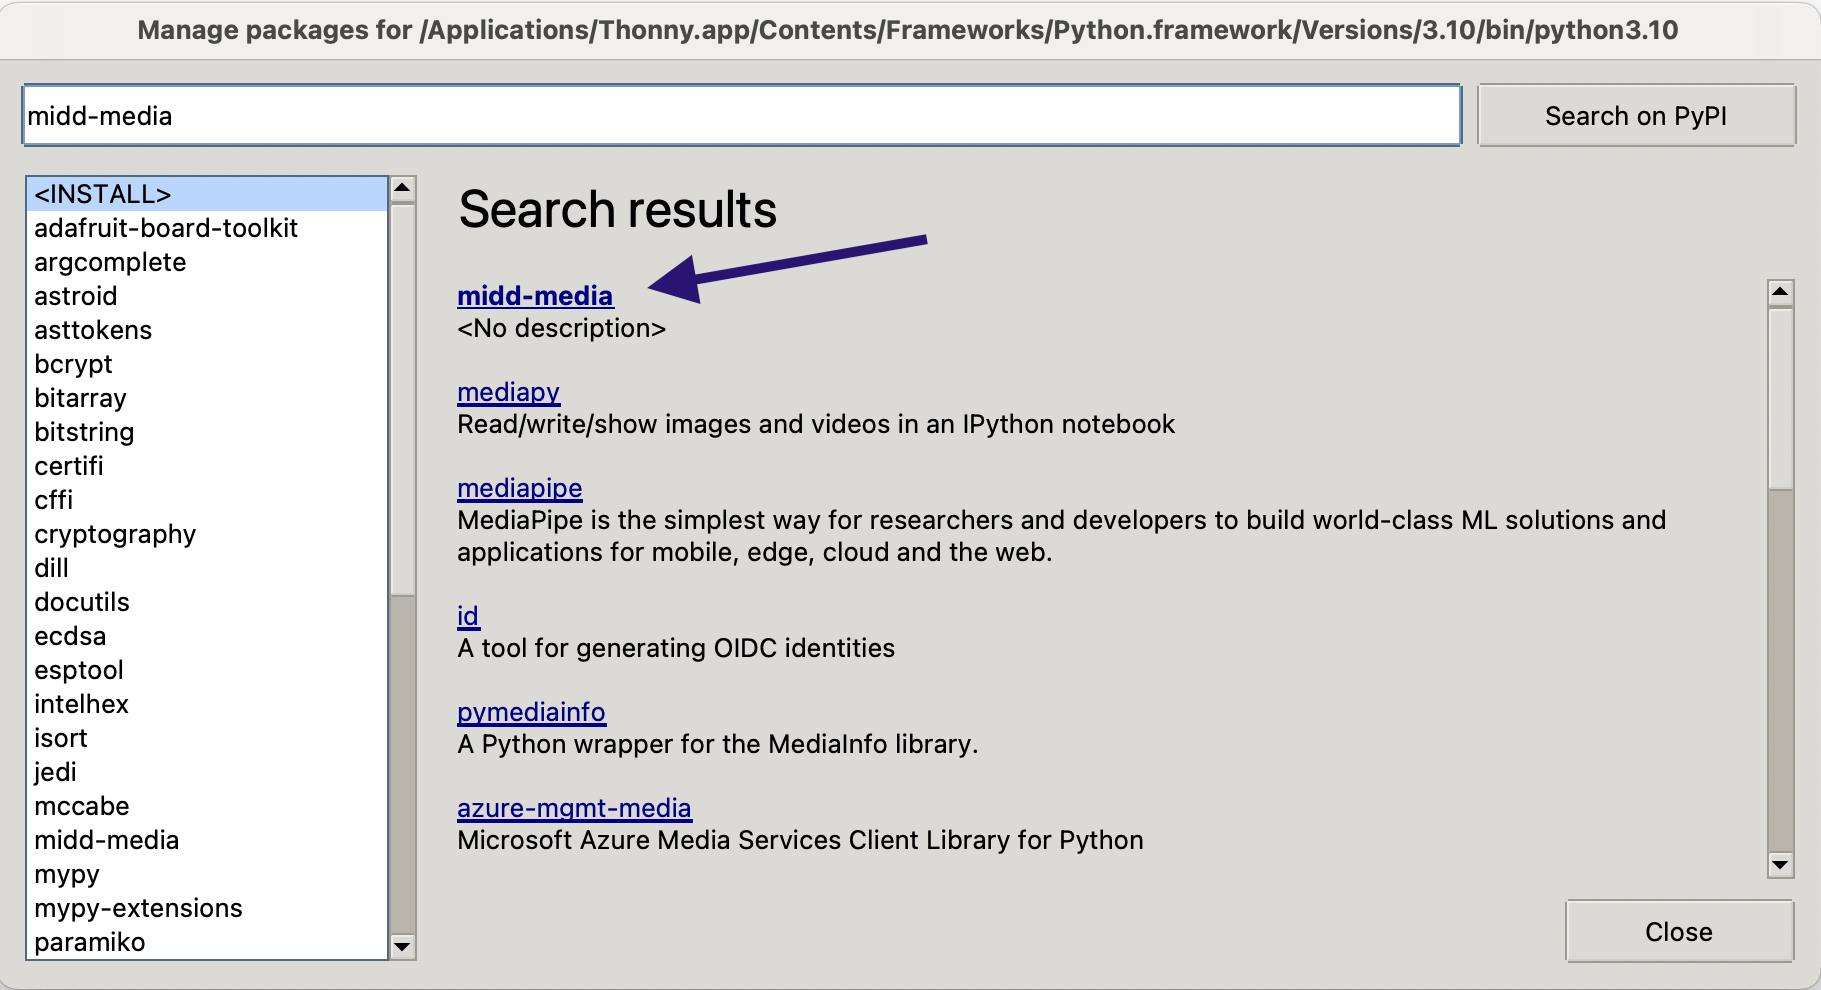
Click
midd-mediain the search results, then click Install. (If it is already installed, you will see Upgrade and Uninstall instead.)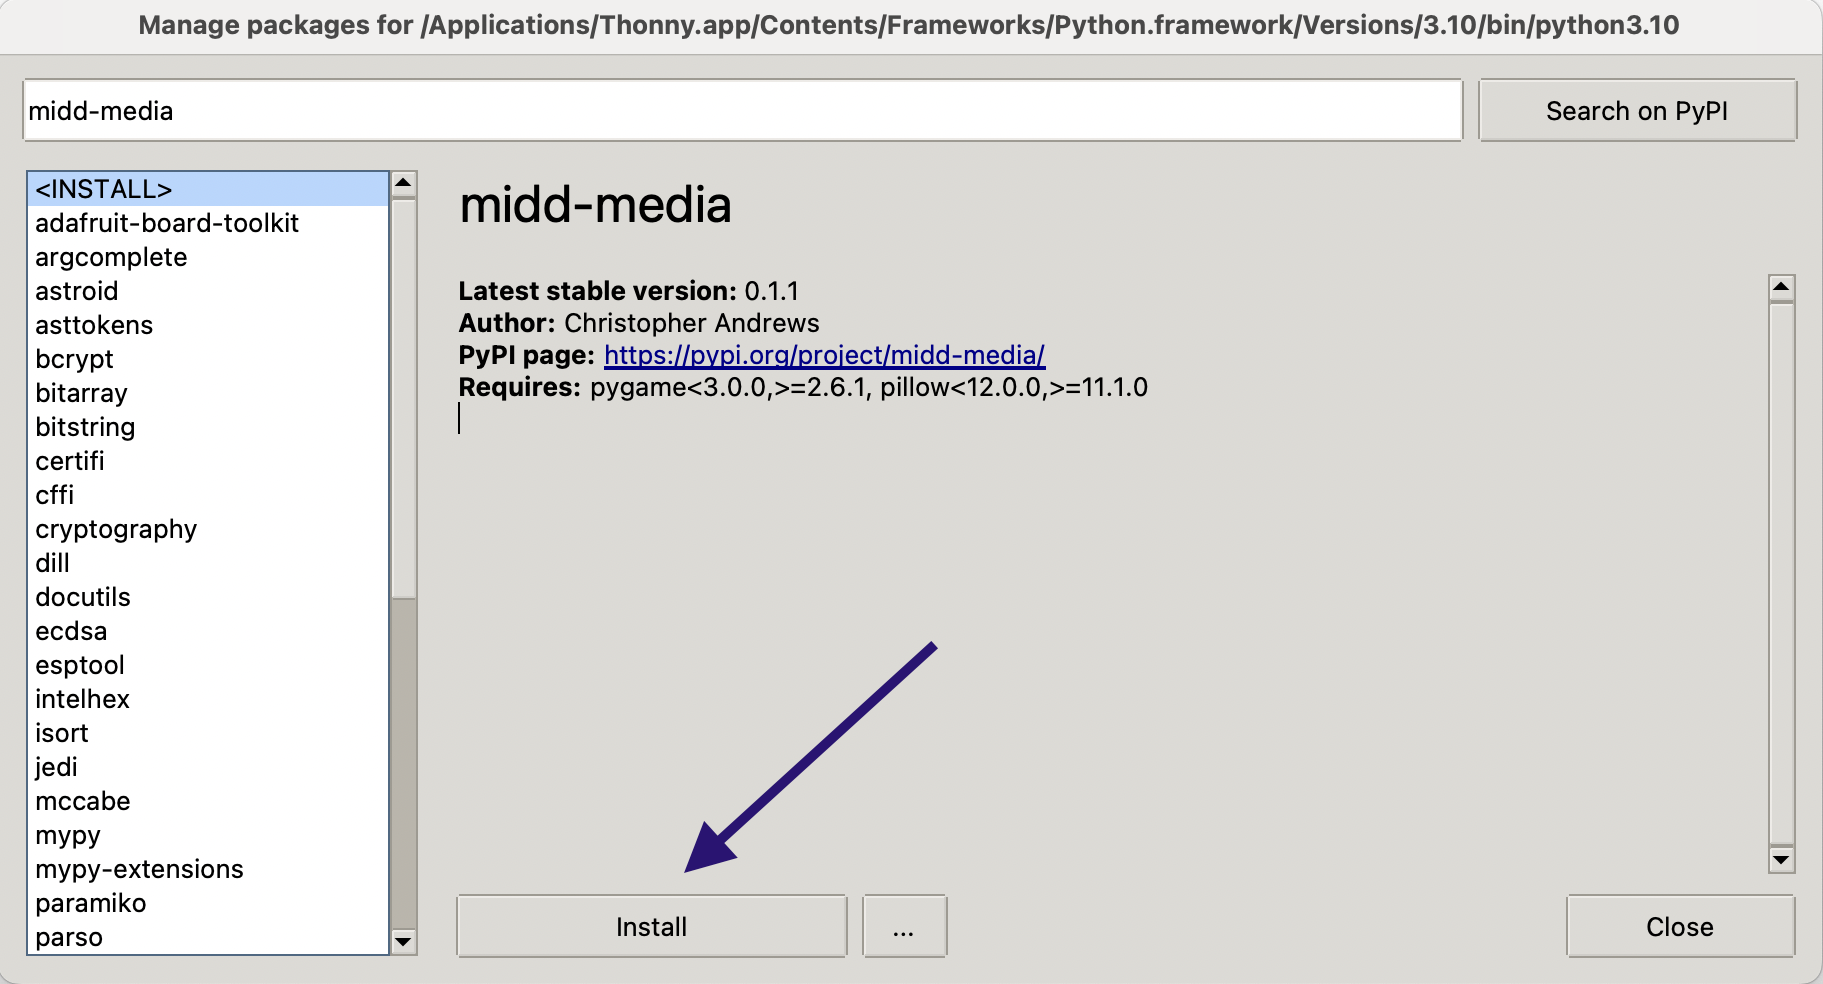
Close the package manager. If you had a program running, click Stop/Restart.
Thonny also installs the packages midd-media needs (Pillow and pygame). You won’t use them directly.
Test your setup
Put an image file (for example, photo.jpg) in a folder, then create a new file in Thonny, save it in that same folder, and run:
from midd_media import middimage

img = middimage.open("photo.jpg")
print(img.width, img.height, img.mode)
img.show()
Your image should open in a separate window.
Using middimage
Start every file that works with images with:
from midd_media import middimageModule functions
middimage.new(width, height, mode)-
Returns a new black image that is
widthpixels wide andheightpixels tall.modeis optional:"RGB"(color, the default) or"L"(grayscale). middimage.open(filename)-
Returns an image loaded from the file
filename, a string. The file should be in the same folder as your Python file.
Image properties and methods
In these examples, img is any image you made with middimage.new or middimage.open.
img.width- The number of columns in the image. This is a property, not a function, so there are no parentheses.
img.height- The number of rows in the image.
img.mode-
"RGB"for a color image,"L"for a grayscale image. img.show()- Displays the image in a separate window.
img.save(filename)-
Saves the image in the same folder as your Python file.
filenameshould end in.pngor.jpg. img.copy()-
Returns a new image that is a copy of
img. Changing the copy does not changeimg.
Pixels
An image is a grid of pixels. img[x][y] is the pixel in column x and row y:
(0, 0)is the top-left corner.xgoes from0toimg.width - 1, left to right.ygoes from0toimg.height - 1, top to bottom. Note thatyincreases down.
In a grayscale ("L") image, each pixel is one integer from 0 (black) to 255 (white). In a color ("RGB") image, each pixel is a tuple (red, green, blue), each an integer from 0 to 255.
>>> img = middimage.new(3, 2)
>>> img[0][1]
(0, 0, 0)
>>> img[0][1] = (255, 128, 0)
>>> img[0][1]
(255, 128, 0)
>>> img[0][1][0]
255
Pixel values must be integers: use int() on the result of a calculation. A value above 255 is stored as 255, and a value below 0 is stored as 0.
Preparing your own photos
You can use middimage with any photo of your own. Before you use one, make sure it is:
- a JPEG (
.jpg). iPhone photos are often.heic, whichmiddimagecan’t open, and screenshots are.pngfiles whose pixels may have a fourth (transparency) value. - about 800 pixels on the longer side. Our code visits every pixel, so a large photo can take minutes.
- named simply, such as
myphoto.jpg, and in the same folder as your code.
On a Mac: Control-click the file, choose Quick Actions → Convert Image, and pick Format JPEG and Image Size Medium. Then rename the new file.
On Windows: open the image in Photos, click … (See more), choose Resize image, pick M or set the longer side to about 800 pixels, and save it as a .jpg.
Shortcut: download prepare_photo.py, save it in the folder with your code, and type %Run prepare_photo.py in the Thonny Shell. Choose your photo, and it saves myphoto.jpg next to the script: upright, in color, and at most 800 pixels on the longer side. It can’t open HEIC files, so convert those first. To prepare more than one photo, rename each myphoto.jpg before running the script again.