Lab 5
Objectives
- Use nested loops to visit every pixel of an image
- Build new images from old ones without changing the original
- Work with pixels as
(red, green, blue)tuples - Write a class with attributes and methods, and use objects of that class
Prelab: before Friday’s lab
Do these steps before lab, so your lab time can be dedicated to the problem solving and programming tasks.
Download the file
lab5.zipby clicking the blue “Download Starter Code” button above; move the zip file to yourcs145/labsdirectory, then extract it (Mac: double-click it; Windows: right-click it and choose “Extract All…”) to create a subfolder calledlab5inside yourlabsdirectory. Then deletelab5.zip.The folder contains two starter files,
lab5_images.py(Parts 1-2) andlab5_rect.py(Part 3), and three photos for trying out your functions:laurie.jpg,dogs.jpg, andfoiling.jpg. Keep them all in the same folder.If you haven’t installed
midd-mediayet, follow Working with Images.
Getting started
Open lab5_images.py in Thonny. It gives you print_pixels(img), which prints the pixels of a small image, one row per line.
Each image function you write returns a new image and does not change img, like grayscale in class.
Testing on tiny images
Big photos make it hard to see small mistakes. Test your functions on a tiny image instead, and look at its pixels with print_pixels. After %Run lab5_images.py, you can use middimage in the Shell. Here is a test of adjust (Part 1):
>>> %Run lab5_images.py
>>> tiny = middimage.new(3, 1)
>>> tiny[0][0] = (200, 100, 50)
>>> tiny[2][0] = (0, 0, 255)
>>> print_pixels(tiny)
[(200, 100, 50), (0, 0, 0), (0, 0, 255)]
>>> print_pixels(adjust(tiny, 0.5))
[(100, 50, 25), (0, 0, 0), (0, 0, 127)]
>>> print_pixels(tiny)
[(200, 100, 50), (0, 0, 0), (0, 0, 255)]
The last call checks that adjust didn’t change tiny. Once a function works on tiny images, try it on a photo with .show().
Keep your test calls in the Shell, or inside an if __name__ == "__main__": block as in Homework 5, not at the bottom of lab5_images.py: Gradescope doesn’t have the photos.
Part 1: Adjust
Complete adjust(img, factor), which returns a lighter or darker copy of a color image. It multiplies every red, green, and blue value by factor: a factor of 0.5 makes the copy darker, 1.5 makes it lighter. The loops are the same as in grayscale; what changes is that each new pixel is a tuple of three values.
- Make a new color image the same size as
imgwithmiddimage.new. - Loop over every pixel with nested loops, as in
grayscale. - Get the pixel’s red, green, and blue values, multiply each by
factor, and set the pixel in the new image to the tuple of the three results. Pixel values must be integers, so useint()on each product. - Return the new image.
You don’t need to check for values above 255: middimage stores them as 255.
>>> img = middimage.open("laurie.jpg")
>>> adjust(img, 0.5).show()
>>> adjust(img, 1.5).show()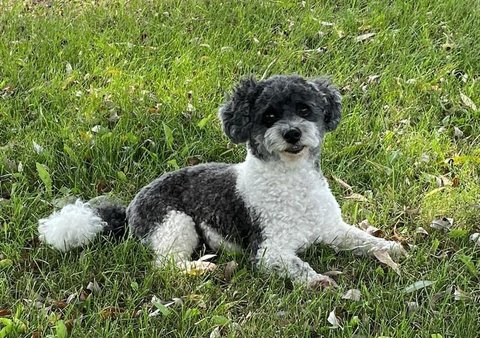
laurie.jpg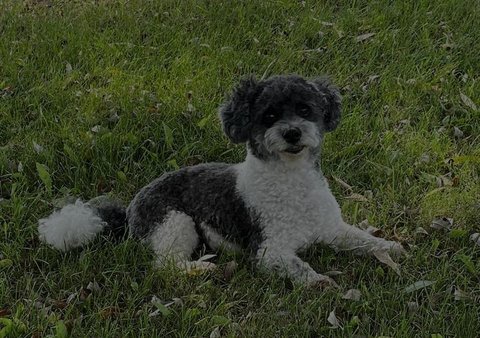
adjust(img, 0.5)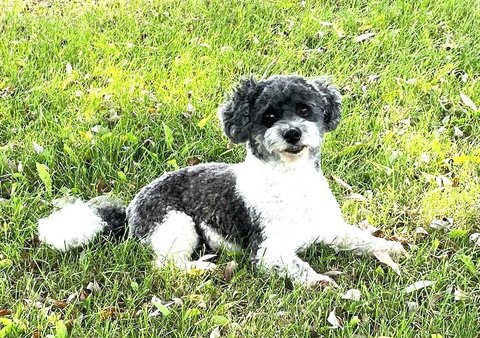
adjust(img, 1.5)This function takes about 6 lines.
Part 2: Mirror
Complete mirror(img), which returns a copy of img with its left half reflected onto its right half.
Start with a copy of the image: result = img.copy(). Then loop over the pixels in the left half only, and copy each one to the matching position on the right side of result. Here is the idea for a tiny image 4 pixels wide and 4 tall:
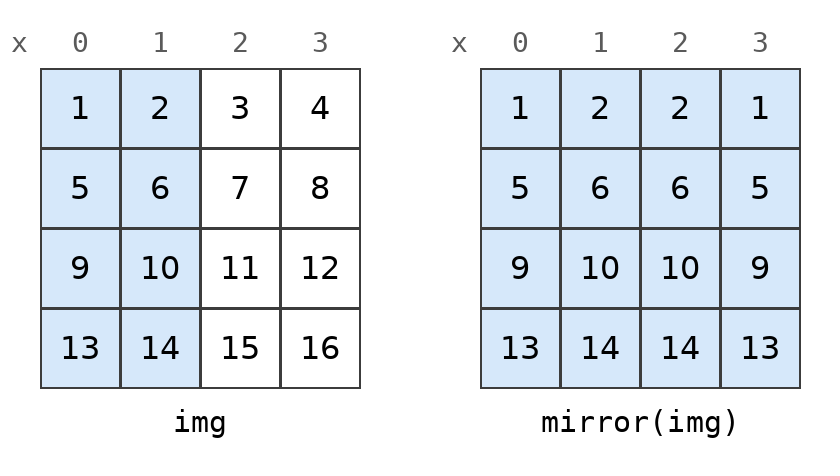
Before you write the loops, work out on paper where the pixels in column x go, for an image 4 pixels wide and then 5 pixels wide. Remember that the last column is img.width - 1. In an image with an odd width, the middle column stays the same.
>>> img = middimage.open("dogs.jpg")
>>> mirror(img).show()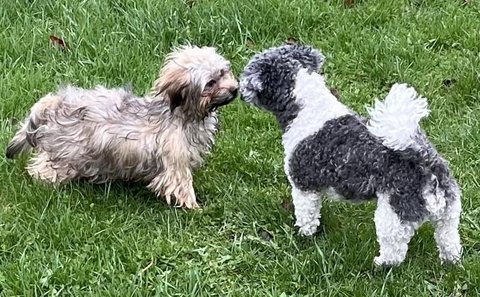
dogs.jpg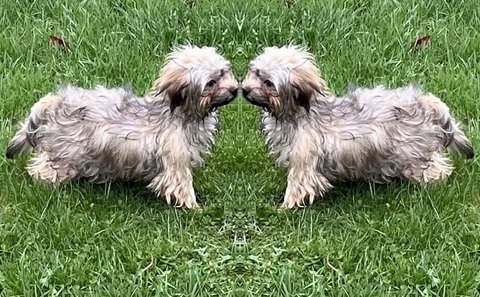
mirror(img)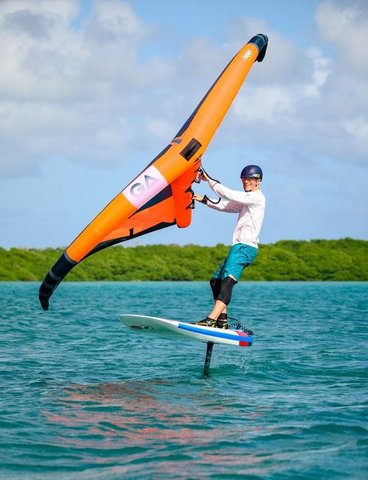
foiling.jpg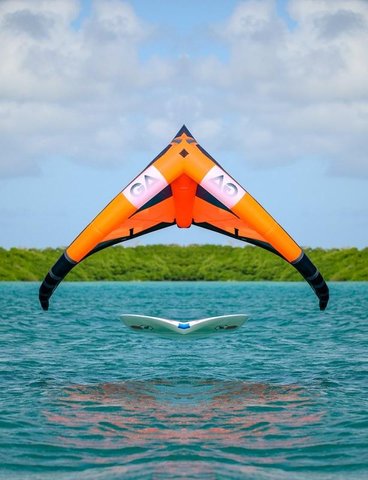
mirror(img)This function takes about 5 lines.
Part 3: A Rect class
Rectangles come up all the time in graphics: a window on the screen, a button, the part of a photo you want to crop. In this part you’ll write a class Rect for rectangles. As in an image, x grows to the right and y grows down, so (x, y) is a rectangle’s upper-left corner.
Attributes and simple methods
Open lab5_rect.py in Thonny and complete these methods of Rect:
__init__(self, x, y, width, height)stores its four parameters as the attributesself.x,self.y,self.width, andself.height.__str__(self)returns a string such as"Rect(5, 5, 10, 20)": the class name and the four attributes in order. Build it withstr()and+.area(self)returns the area.aspect_ratio(self)returns the width divided by the height, the shape of the rectangle: 1.0 is a square, more than 1 is wider than tall.
>>> %Run lab5_rect.py
>>> r1 = Rect(5, 5, 10, 20)
>>> print(r1)
Rect(5, 5, 10, 20)
>>> r1.width
10
>>> r1.area()
200
>>> r1.aspect_ratio()
0.5
>>> r2 = Rect(6, 2, 25, 5)
>>> print(r2)
Rect(6, 2, 25, 5)
>>> r2.area()
125
>>> r2.aspect_ratio()
5.0
Each of these methods takes 1 to 4 lines.
Intersection
Now complete intersection(self, other), which returns a new Rect for the region where self and other overlap. If they don’t overlap, it returns None.
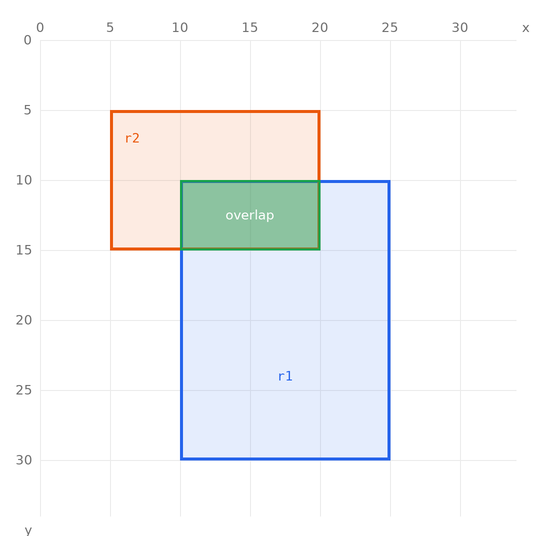
Rect(10, 10, 15, 20) and Rect(5, 5, 15, 10) overlap in Rect(10, 10, 10, 5)Look at the edges of the overlap in the picture:
- Its left edge is the larger of the two left edges, and its right edge is the smaller of the two right edges. A rectangle’s right edge is at
x + width. - Its top edge is the larger of the two top edges, and its bottom edge is the smaller of the two bottom edges. A rectangle’s bottom edge is at
y + height.
Steps:
- Compute
left,right,top, andbottomfor the overlap withmaxandmin. Check them on paper against the picture. - If
rightisn’t greater thanleft, orbottomisn’t greater thantop, the rectangles don’t overlap: returnNone. This includes rectangles that only touch along an edge. - Otherwise, return a new
Rectwith upper-left corner(left, top). Its width and height come from the four edges.
>>> r1 = Rect(10, 10, 15, 20)
>>> print(r1.intersection(Rect(5, 5, 15, 10)))
Rect(10, 10, 10, 5)
>>> print(r1.intersection(Rect(15, 12, 5, 8)))
Rect(15, 12, 5, 8)
>>> print(r1.intersection(Rect(15, 20, 30, 5)))
Rect(15, 20, 10, 5)
>>> print(r1.intersection(Rect(30, 5, 50, 50)))
None
>>> print(r1.intersection(Rect(25, 10, 5, 5)))
None
The second example lies entirely inside r1; the last one only touches r1’s right edge. Your method should give the same result whichever rectangle you call it on: r1.intersection(r2) and r2.intersection(r1) are the same rectangle.
This method takes about 7 lines.
Try it on your own photo
Just for fun, try adjust and mirror on a photo of your own. You’ll use your own photo in Homework 6: see Preparing your own photos.
Submitting your work
When you are done, submit lab5_images.py and lab5_rect.py to Gradescope.
Ensure that the upload succeeds and your submission passes all visible tests.