Programming Exam Study Instructions
You can download .zip files with directories for each problem from canvas using the following links. Do not share these with anyone who is not in the class.
The first file you should look at is problem.md. This is a markdown file. To view a more human-readable version of it, open it in VS Code then use command+shift+V (mac) or control+shift+v (windows). This file tells you what you will have to implement for each problem, along with giving an overview of the structure of the classes you’ll work with.
The code includes starter code (in src/main/java) and tests (in src/test/java) for each problem. These are the same tests you’ll be given during the exam.
I recommend that you do each problem and check that you pass the tests for that problem before the exam - they are being provided to give you study material and make the process less stressful! Make sure you do not change the file structure if you want the tests to run!
Running the tests
The tests are written using JUnit. You are welcome to look at the test cases, but (a) you aren’t expected to understand everything about how they are written, as we haven’t talked about JUnit and (b) you should ensure that the code you write does not overfit to the test cases!
To complete the problem and run the tests, follow these instructions:
- Install the
Test Runner for Javaextension. You should now see an icon that looks like a half-full laboratory flask on the left side of your VS Code window. - Open up the code for the problem you are trying to implement by opening the folder specific to that problem.
- Implement the required methods. The code you’ll write is in
src/main/javaand the tests are insrc/test/java. - Navigate to the testing tab, where you should see something like this:
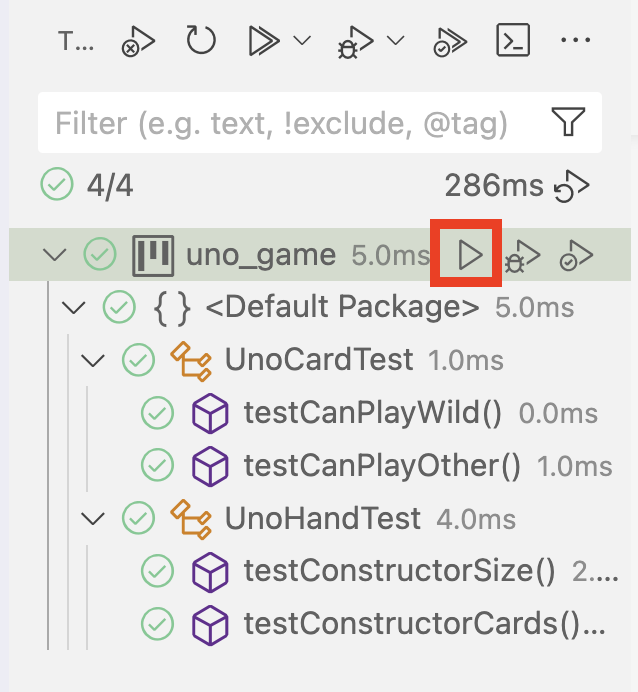
- Run the tests by clicking the button that I’ve outlined in red.